Tag Archives: cooking

Don’t you… Forget About Me!

Man… living in todays modern world with no internet connection is ROUGH… I havent had an internet connection since mid-March… Long story… I will say that I just moved and I havent had the chance to get my internet hooked up yet, but I hope to have it and my blog up and running again by next week. (Im at work on a break right now!) Im bummed that I have really missed some good holidays and opportunities to share recipes. Obladi, oblada, life goes on! Man, I miss you guys & I hope you have missed me. So, here’s to next week! I’ll bring the food! 😉

Flaky Vegan Pie Crust… and Easy Apple Crostata

I genuinely LOVE this pie crust recipe. The original version is found in ‘The Joy of Vegan Baking’ , though due to my cabinets needing to be replenished, I  had to make a few small adjustments… much to my delight, the dough still came out wonderfully! If you are in a fix and feel like you don’t have time to make an entire pie, check out my recipe for a simple yet impressive apple crostata! There are so many things to be done with a good crust around the holidays, I would recommend having some dough in the freezer (or refrigerator) for when the baking mood strikes!

FLAKY VEGAN PIE CRUST

This makes enough for two 9″  pie crusts or one covered pie crust (a pie with a top & bottom crust). This dough freezes well or can be refrigerated until ready to be used.

TIP: I always put ALL of my ingredients into the freezer for about 30 minutes before making the dough. The easiest way to do this is to measure your dry ingredients in a bowl, put it in freezer. Cut up your shortening and butter into 1/2″ chunks and put in freezer in a small bowl. You want the fat to stay as cold as possible for the flakiest crust!

  • 2 cups unbleached flour
  • 1/2 cup whole wheat pastry flour
  • 1/2 tsp salt
  • 1 tsp sugar
  • 1/4 cup vegetable shortening
  • 3/4 cup soy margarine
  • 1/3 cup ice water (plus a splash more if necessary)

(In the original recipe I mentioned above, the entire amount of flour used is unbleached all-purpose flour and the shortening to margarine ratio is 50:50. Feel free to use either version!)

MAKING THE DOUGH (use chilled ingredients)

1) Combine the flour, sugar, and salt in the food processor. Blend about 10 seconds to mix well.

2) Scatter the pre-cut shortening/butter over the dry ingredients and PULSE in little bursts until the fat is broken up into the size of gravel or peas.

3) With the machine turned off, slowly drizzle the ice water over the top. Now pulse  several times until no dry patches remain and it begins to clump. Squeeze a bit of dough in your fingers – if it sticks together, it is ready to be gathered up by hand… If not, add a touch more water and pulse again. Do NOT allow the ball to roll into a single mass (such as you would with bread or pizza dough). For a good flaky crust, you want it to hold together but you want it to look chunky, discolored/patchy and rough. You should be able to see little bits of butter or shortening here and there.

4) Divide the dough in half, pressing each into a flat round disc and wrap tightly in plastic. Refrigerate at least 30 minutes (or up to several days) before rolling. The dough can also be tightly wrapped and frozen for up to 6 months. (Thaw completely before rolling.)

Here is a shot of one of my dough discs (The recipe shown HERE will be posted later this week!)

ROLLING THE DOUGH

First lightly sprinkle your working surface with flour.  Personally, I like to roll my dough out right on top of the saran wrap it was wrapped in and use a lightly floured rolling-pin.  That way it won’t stick, it spins easily and it can be flipped right onto my baking sheet or into my pie plate when I am ready!

When rolling out dough, the trick isn’t to “roll”, but to “press” the dough outward from the middle. I roll my dough out from the center, turning the dough as I go so I am rolling outward from different directions. If you get a split in your dough, it may just be too dry… just gently “glue” it back together with a dab of cold water. Roll it out, big and nice – I’d shoot for 2-3″ wider than your pie plate. Most pies are 9″ so I’d say shoot for a circle close to 12″ across.

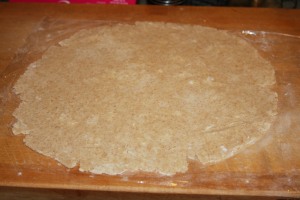
Rolled out & ready to flip into a pie plate… or turned into a delicious crostata!

TIP: To relax the dough and avoid shrinkage, chill the crust in your pie tin for 30 minutes before filling and baking. If you are making a crostata, just transfer your dough onto a parchment lined baking sheet and go for it!… Making a crostata is an easy way to look like you’ve been slaving away in the kitchen all day… when in fact… you haven’t!

MAKING AN APPLE CROSTATA

This recipe is great for when you don’t have time to make a pie! I would imagine that you can really use any fruit for this simple dessert… I have used apples and peaches (both were a hit), though I would guess raspberries or blueberries would also work.   It appears that a lot of work went into it when you can literally throw it together and get it in the oven in about 15 minutes, start to finish – that is, if you already have pie dough ready!  Serves 4 (though it can be cut to serve 6). Eat it for breakfast… or dessert!

You will need:

  • one pie crust (for one 9″ crust) rolled out into a 10-12″ circle
  • 2 fresh apples (or 2 peaches, if you prefer… I only used one apple in these pictures, but I would recommend two)
  • splash of lemon juice (if using apples)- optional
  • 1 tsp cinnamon
  • dash nutmeg
  • 1 Tbsp  sugar
  • 1 Tbsp soy margarine
  • 1 Tbsp sugar for sprinkling over the top
  • soy milk for the “egg wash”

1) Simply cut the apples into thin slices. Put in a bowl and drizzle a tiny bit of lemon juice over them and toss to keep from browning. I’m not really sure how necessary the lemon juice is, since it’s all getting baked in brown cinnamon anyway! But, do as you wish!

2) Roll out your pie dough and flip it onto a parchment covered baking sheet.

3) Dump apples into center of pie dough. Sprinkle the cinnamon, sugar, and nutmeg over them. Dot all over with butter.

Roll out dough, pile on the fruit… believe it or not, this is only ONE apple!

Almost ready to bake!

4) Fold up edges gently and carefully around the center, pinching closed slightly if & where necessary. Brush the dough with soy milk and thoroughly sprinkle the remaining 1 Tbsp of sugar over the top.

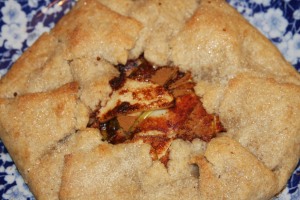
Bake at 425 F for 16-20 minutes or until golden! Let cool 5 minutes before sliding it right off the parchment onto a serving dish. Serve to the “ooh’s” and “ahh’s” of those awaiting!

An impressive yet simple dessert!

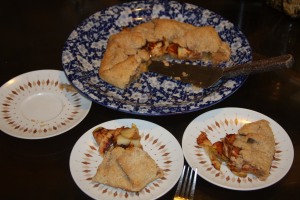
Cut into 4 or 6 slices! Serve with vanilla ice cream, if desired! Eat for breakfast or dessert!

(I would like to note that I have made this crostata using spelt flour as well and though it was more delicate, it turned out delicious!)

Creamy Pumpkin Pancakes

I’m ready for the change of seasons.  I happily welcome Fall… and all its wonderful seasonal produce! Not to mention the color of the leaves… the crisp autumn air… the promise of gathering with family… even just the idea of an enticing aroma being emitted from a warm kitchen on a chilly day fills me with – for lack of better words – the spirit of the season!

Today is October 1… also known as World Vegetarian Day. Celebrate all walks of life by eating a meatless meal tonight, whatever it may be!  (Earn extra good karma points by having a vegan meal!)

If you haven’t noticed, my family likes breakfast foods a lot! Pancakes aren’t just considered a breakfast food in our home… sometimes we even eat them for dinner.  I usually throw some tempeh or soy-sage on the side for some added goodness. Pancakes are one of those meals that I can count on my kids more or less cleaning their plates, so anything I can mix into the batter to give some added nutrients is a plus.  (That reminds me – I recently read somewhere that recommended making pancakes using fresh carrot juice instead of milk.  I want to try that!)

October always puts me in the mood for cooking with pumpkin. Maybe because they are orange, or because of Halloween, or maybe cause I know we’ll be watching ‘It’s the Great Pumpkin, Charlie Brown’  soon. And since we’re talking about it, I don’t blame Linus at all for believing in the Great Pumpkin.  After all, pumpkins are full of vitamins that help healthy vision, bone growth, reduce the risk of cancer & signs of aging, and offer protection against heart disease. They are loaded with vitamin A and antioxidants; they are also a good source of vitamins B, C, K, and E, and lots of minerals, including magnesium, potassium, and iron. According to The World’s Healthiest Foods, pumpkins were found to be so prized by Native Americans for their nutritional value that pumpkins were often buried with the dead to provide them with sustenance in the next world. So… what’s not to believe in? Come to think of it, maybe they should’ve named that movie “It IS the Great Pumpkin, Charlie Brown – and don’t you forget it!”

These pumpkin pancakes are so creamy they literally melt in your mouth.  I like to use almond milk and top the pancakes with chopped pecans. They are best cooked silver-dollar size… and eaten immediately, of coarse!

Creamy Pumpkin Pancakes

  • 1 1/2 cups all purpose flour
  • 3 Tbsp sugar or liquid sweetener
  • 1 Tbsp baking powder
  • 1/2 tsp salt
  • < 1/2 tsp pumpkin pie spice
  • 1 1/2 cup almond milk (or any non-dairy milk)
  • 1/2 cup or more pumpkin puree… I like to use 1/2 can of pumpkin (one can = about 2 cups)
  • 1 Tbsp canola oil
  • 1/4 cup water
  • pecans for topping (optional)

Mix dry ingredients together in large bowl. Mix wet (including pumpkin) in small bowl. Mix wet into dry. Cook silver dollar size pancakes on a hot griddle.  Top with chopped pecans & maple syrup! Devour!

It’s easy to turn a simple pumpkin pancake into a Halloween-inspired breakfast if so desired!

(To make a super easy pumpkin face, you could draw curved lines down the pumpkin from top to bottom using a chocolate chip.  I threw these “pumpkins” together in a real jiffy, hence the simple banana jack-o-lantern face… You could also easily make a face using chopped nuts or cut pieces of dried fruit – like apricots or mangos – or even small triangles of dark chocolate! Mmmm!)

If you are more of a waffle person, try these delicious pumpkin waffles!

Homemade Vegetarian Sausage

Check out our newest ‘Dinner and a Movie’ night, featuring the 1972 classic, ‘Charlotte’s Web’ and some homemade vegetarian sausage.  If you have never seen this great cartoon, what are you waiting for! It’s a family favorite over here…. And if you haven’t seen it since 1972, it’s time to rent it again!  (No offense to the newer version with Dakota Fanning and Julia Roberts, but you just can’t beat the animated classic!)

Click HERE to read all about it and to get the recipe!!


Whaaa?! Its already September?!

We have been pretty busy around here lately. I cant believe summer is almost over! Well, I don’t really mind too much because I LOVE fall!!  My kids and I even decided to start our own school this year (which is basically modeled after the big kid school)… with lessons, experiments, field trips, art classes and other activities… Naturally, I am the teacher (even though there are times when the role seems reversed! There is nothing like kids to humble you…  Sometimes they teach me a lesson about a thing or two… most often it is a lesson on patience! Hahaha) The kids have really been loving it! We checked out several “Little Hands” learning & activity books from the library… great books, by the way, if you have a kid around 2-6.  They have some great ideas on ways to teach science, math, you name it.

I just cant wait to be carving pumpkins, visiting the pumpkin patch, dressing up & decorating for Halloween, making seasonal arts and crafts, preparing for the holidays, baking fall goodies that smell up the house, and  just opening up  the windows and enjoying the nice cool crisp air!  (And it doesn’t hurt that my birthday is this week either, which means we are going to eat at my favorite restaurant in town, The Grit!) Hey! That also means my blog is about to be 1 year old!  Wow!  I can’t believe it! I hope you have been enjoying watching my little blog baby grow this year! 😉

Those of you who truly know me know that I am a list maker… And well, I have already been compiling quite a long list of all the awesome “fall foods” I’m hoping to get around to making this year! I’m gonna be trying my hand at making vegan caramel (and caramel apples!) and candy apples, all of which I have never tried… And of coarse I love making the usual fall classics… pumpkin bread & pumpkin pie (or any kind of pie for that matter!) and Thanksgiving (sigh)… Mmmmmm… Thanksgiving!! … And it will be here before we know it. (My mouth literally started watering just thinking about Thanksgiving!!)

Oh yeah… I wanted to say I’m sorry it’s been so long since my last Dinner and Movie post. We will be watching Charlotte’s Web (the cartoon version) this week and making… you know what?…  I’ll just let it be a surprise! Tee hee hee! We have been reading the book and we are almost finished!  My kids love it! It was one of my childhood favorites as well.

ANYWAY!  Enough babbling! Here’s what we’ve been up to in the kitchen lately!

PRESERVING OUR SUMMER BASIL

Not very long ago, I made this easy basil walnut pesto,which I hope you enjoyed! I read about this easy method of preserving pesto, so I thought I’d give it a try…

First, I froze the pesto in one of those little rubbery ice tray things (mine happened to be heart shaped) and covered it in saran wrap and put it in the freezer. Then I popped them out several hours later after they were good & frozen and put them in a ziplock freezer bag, separating the hearts with some wax paper. They can be used to throw into sauce, straight onto noodles, you name it.  I’m so happy I learned this cute and easy way to save my summer basil! (Hopefully they will end up tasting as good as they look!)

MAKING A HEALTHY “FUNNY FACE PANCAKE”

Last weekend, I treated my kids to a healthier version of the “IHOP funny face pancake”.  I just used my regular pancake recipe and added 1/3 cup cocoa, 1/2 cup vegan chocolate chips and changed the water amount to 1/3 cup.  All you need for decorating is your fruit of choice!! No whipped cream needed! I thought they turned out adorable, don’t you?! The kids just loved them!

SOMETIMES A SURPRISE TREAT IS THE BEST KIND!!

We accidentally ended up with some chocolate covered strawberries when I left my box of vegan truffles on the stove as it was warming up! Oops! But hey, this was so beautifully meant to be, I’m NOT complaining! They were magnificent! I think I may do that again on purpose! We dipped them, chilled them… then devoured them!

HERE”S SOMETHING I’D LIKE TO MAKE!

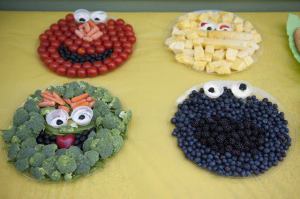
This Sesame Street inspired snack wasn’t made by me… yet!  This is on my list of things to make asap!  Isn’t it just adorable? How gloriously fun (& healthy) to eat!

Spelt Scones

I’ve been doing a good bit of baking lately.  My sister (who is GF) recently had her first baby, so I have made her these scones a multitude of different ways… with raspberries, strawberry-walnut, and banana-walnut.    These scones are very versatile and I have found that practically any fruit works wonderfully!  I really enjoyed them when I used 1 cup of bananas and 1/4 cup of chocolate chips 🙂  I can truly say I dont think anyone would know that these are gluten free*.  And the best part about using non-gluten flour is that you dont really have to worry about overmixing!  These scones are lightly sweetened with agave nectar & are so light it is almost as if they fell right out of the sky. I love them!

* Spelt flour is a good subsitute for people with a low intolerance for wheat, though some people with serious wheat allergies, such as those with celiac disease, are also allergic to spelt. In that case, you should try replacing the flour with a 100% gluten free baking mix (most grocery stores carry a blend for general flour replacing).

Spelt Scones

  • 2 cups spelt flour
  • 1 Tbsp baking powder
  • 1/2 tsp salt
  • 1/3 cup canola oil
  • 1/3 cup agave nectar (i use the amber kind)
  • 1 Tbsp vanilla extract
  • 1/3 cup hot water
  • 1 heaping measuring cup of fresh or frozen fruit of choice
  • > 1/2 chopped nuts (optional)

1- Preheat the oven to 375.  Line a large baking sheet with parchment paper. In a bowl, whisk the spelt flour, baking powder and salt.

2- In a separate bowl or large measuring cup, measure the oil, agave nectar and vanilla and whisk together until fully combined.  Add to the dry mixture.  Stir in the hot water, then gently fold in the fruit and nuts, if using. (If I recall , the first time I made these I questioned the appearance of the batter… too mushy? not enough?… but I’m telling you, they will turn out beautiful.)

3- Sccop the batter (I like to use my 1/3 cup) onto the baking sheet.  If you make them smaller you can actually make 12.  However, I found I prefer the size of the scones when I make 7-8 (making each one < 1/3 cup). You may lightly brush the tops with oil, if desired.

Bake for 17-20 minutes until golden.   Once they begin to turn golden, I usually peek under a scone to check how dark the bottom is to decide when to pull them out! Let cool slightly and then devour!

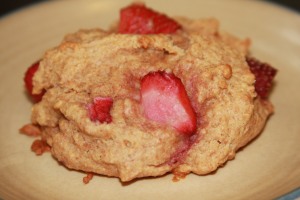
Ahh.. a satisfyingly simple strawberry gluten free scone!


Vegan Lasagna with Tofu Ricotta

Well, Valentines Day is tomorrow.  You know, when someone puts their time and energy into making a homemade meal, there is nothing that could be better or more loving, at least in my opinion. I would much rather enjoy a delicious homemade meal for Valentines Day in the privacy of my own home than to sit in a crowded restaurant with (often) over-priced food.  Maybe that’s just me, but there is something extremely sexy about a man (or woman) cooking in the kitchen for their loved one.

Valentines Day is also one of those occasions where you may want to consume a small (or large) amount of wine – I would like to use Sir Paul McCartney as my example here, when he sings, “I want to tell her that I love her a lot, but I gotta have a belly full of wine”… well, who wants to stop ole Paul from saying that?! And what better a day than Valentines to say or hear those words ‘i love you’… without also hearing an “Uh oh, my dear – we are being pulled over”!  Yes, Valentines Day is a great opportunity to stay home and have a nice candle-lit home cooked meal… and to indulge a bit 😉

So, one of my favorite meals EVER is lasagna. There is nothing in the world like a good lasagna.  There are many things to love about lasagna.  I love how versatile lasagna is.  I love how yummy it is.  I love how you have leftovers.  I love that my kids love it.  I love how you can basically make it out of whatever veggies you have in the fridge.

When I make lasagna, I usually stick to the basics… onion, spinach, mushrooms, zucchini and yellow squash.  Combine those with some noodles, a good sauce (homemade is best, but sometimes you gotta go with the jar), and a good ricotta recipe and you will find yourself content.  Make that very content.

Now I would like to share with you my delicious homemade ricotta recipe.  It is SO easy, and SO good, you better just prepare yourself!

~ TOFU RICOTTA ~

This is my original delicious tofu ricotta recipe.  This is enough for one lasagna. Simply blend until desired consistency in the food processor – be sure to pulse in the basil last so your ricotta wont turn green!

  • 1 block extra firm tofu (drained)
  • 1/2 – 1 cup soymilk
  • 1/2 cup nutritional yeast
  • 1 cup Vegan Gourmet mozzarella cheese, shredded (you will need one entire block to have enough to shred some on top)
  • 1 Tbsp lemon juice
  • salt & pepper
  • 1/4 cup chopped fresh basil (pulse in last)

ricotta necessities (minus basil and tofu)

blending up the ricotta in my food processor

Heres how much basil I used - please note that this amount of basil is for two lasagnas.

TO MAKE (ONE) LASAGNA:

You will need:

  • at least one jar of sauce
  • lasagna noodles (1-2 boxes)
  • veggies of choice (my last lasagna contained: 1 onion/ 1 cup chopped mushrooms/ 2 zucchini & 1 squash, quartered/ 2 cups packed spinach).

Start by cooking your lasagna noodles al dente.  I like to saute my veggies about 5 minutes to soften them up, then I just stir them right into my ricotta to save a step for easy lasagna stacking. Assemble lasagna as shown below in a 13 x 9″ pan and bake for an hour, covered, at 350.  Sometimes I like to broil it uncovered for 2-3 minutes at the end, just to get the top cheese meltier.

(That last step of broiling is unnecessary if you use Daiya cheese, though I LOVE the flavor of the Vegan Gourmet so much, I have actually never tried to make lasagna using Daiya, though I bet it would be just as fabulous. You maybe would need two bags though, since it comes pre-shredded.)

  • shredded cheese on top
  • sauce
  • noodles
  • sauce
  • ricotta/veggies
  • noodles
  • sauce
  • ricotta/veggies
  • noodles
  • layer of sauce on bottom of pan

These are my favorite noodles

dont forget to wash your veggies!

I like to lightly saute all the veggies

Here I am, building up the layers...

Here is one of them about to go in the oven... I would've liked to have a bit more cheese on top but I ran out!

Voila! This slice for my daughter came out beautifully!

I like to eat mine with some good buttered bread on the side! You gotta have bread to wipe up all that extra yummy sauce and ricotta that falls out!

Our family was part of a “food tree” where we signed up to bring a home cooked meal to a friend who just had a baby, hence the two lasagnas.  If you ever have the opportunity to participate in one, sign up!  It feels so good to help people! And you parents (especially you new parents) know how good a nice meal can be when you don’t have to throw it together yourself while the baby is napping!  (And just so you know, they said the lasagna we brought them was “the bomb”!)

Homemade Pizza, Vegan Style

Who doesn’t love pizza?  There is something very satisfying about making a delicious homemade pizza, made to order.  Some people think that when you go vegan, you  have to give up pizza, but that is simply untrue. After all, all a vegan really does is replace the animal ingredients with plant-based ones.  It’s easy… and most of the time it is better for you!  In fact, when I became vegan, I also discovered that I really enjoy a pizza loaded with veggies without cheese at all!

But, there are definetly times when I feel like eating a cheesy pizza… & when I do, I like to use either Follow your Heart brand Vegan Gourmet mozzarella or Daiya mozarella. My husband prefers the flavor of the vegan gourmet, but I think both are just delicious!  (You may want to note that the daiya “cheese” is a gluten & dairy & soy free cheese… And also, it does tend to melt better on a quick cooking time, (such as this 12 minute pizza), which is probably why our local pizza shop offers the Daiya cheese on the vegan pizzas rather than the other brand.)

delicious daiya "cheese"

So, when Im in a pinch for a quick dinner this is my go-to crust.  It doesnt require any real rising time, which means by the time you blend the dough up, you can practically slap it right onto your pizza pan, top it with sauce, veggies & cheese and bake it for 10-14 minutes… so this can definetly be an under 30 min meal from start to finish 🙂

 Your Vegan Neighbor’s Quick & Easy Pizza Crust

(makes one large crust)

  • 1 1/4 cup unbleached flour
  • 1/2 cup cornmeal
  • 1/4 cup vital wheat gluten
  • 3/4 tsp salt
  • 1 Tbsp yeast (I use a kind that I buy in a jar in the flour aisle of Kroger, Fleishmans bread machine yeast)
  • 2/3 cup hot water + enough olive oil to meet the 3/4 cup mark on my measuring cup

(If you are unfamiliar with using yeast, you should note that water that is too hot will kill the yeast.  You do not want to use boiling water.  In fact, I usually stick in my finger to see if it is a good temperature.  It should be tolerable to the finger – it shouldn’t burn you, but it should feel hot!)

1) Preheat oven to 450 F.

2) Mix dry ingredients in the food processor.  Pour the hot water/oil in through the feed tube and let the dough form a ball.   Process for about 40 seconds, then transfer to a lightly-oiled bowl or a floured surface.

3) Let rest for several minutes while you prepare your toppings, then punch it down & roll it /stretch it out to fit your pan. If it doesnt want to stretch as big as you want, just let it rest another minute, and if it gets too thin & starts to tear anywhere, just pinch it back together.

4) Add sauce, toppings & bake for 10-14 minutes until cheese is melty or crust is golden brown.

making the doughball

Here is my dough ball after resting about 10 minutes while I chopped all my veggies!

It is good with cheese or just plain and loaded with veggies!

Misc pizza tips: I use a pizza pan with holes in the bottom.  I think that helps the pizza cook more evenly.  I also give my pan a quick spray w/non-stick cooking spray to ensure that my pizza doesn’t get stuck!  When my pizza is about to go in the oven, I think that drizzling a little olive oil all around the edges of the crust gives the pizza a fantastic end result!

Your Vegan Neighbor’s Homemade Pizza Sauce

Whisk together the following ingredients and spread on prepared crust! This makes enough for 2 pizzas.  (You can also freeze half for another time!)

  • 1 – 6 oz can tomato paste
  • 1 can of water (use tomatoe paste can)
  • generous splash of olive oil
  • 1/2 tsp salt
  • 1/4 tsp pepper
  • 1 Tbsp nutritional yeast
  • 1/8 tsp garlic powder
  • 3/4 tsp basil
  • 1 1/2 tsp oregano
  • < 1/4 tsp thyme
  • 3/4 tsp fresh rosemary (or 1/2 dry – I have a big rosemary bush so I almost always use fresh rosemary!)

Some of my favorite toppings are chopped broccoli, onion, cubed tofu, black olives, spinach, garlic, artichoke hearts… You’d really be surprised at what your kids might eat when it’s cooked into a delicious pizza! The Yves brand soy pepperoni is pretty good but my kids think it’s a little too spicy for them. And sometimes we just go for a plain pineapple & cheese pizza 🙂  Mmmmm!  I think I’m ready for another slice…

Look! There's a piece of broccoli going in with that bite!

Taking a cautious bite of fresh baked (& little hot) pizza!

Soysage Casserole

This is a great breakfast or dinner casserole.  I could literally eat this for every meal – and so could my kiddos 🙂  It can also be made ahead of time, which is great if you are a busy body.  I included this in the “child’s play” category because it’s easy to assemble, but mainly because the kids love helping tear up the bread (though obviously they can’t help cook the “soysage”!).

For this recipe, I prefer using Lightlife Gimme Lean “sausage”, though any other kind of vegan sausage would surely work (though I have never used another kind).  Some people don’t care for all these “fake meat” products, but for the most part, I find them tasty and a quick healthy source protein.  Having been vegan for 10+ years now, I have tried almost every brand of fake meat, cheese & other non-dairy products out there and I’m always open to trying anything new that I see. Some faux-foods have been not-so-great, but I definitely also have ones that I truly enjoy & find delicious!  If you ever want to know my opinion on a product, don’t be afraid to ask! (P.S. I do not get paid by any company whose products I show… If I am endorsing it, it’s because I truly think its great to use in my recipes.)

That being said… onto the bread!  I find that the heartier/granier the bread the better the casserole.  I would not recommend using a really soft bread, as I have found through experience.  I really like using Masada 6-Grain bread. I cannot stress this enough-  a thick, hearty (or grainy) bread makes the best casserole!

This recipe has been adapted from one of my favorite cookbooks, Vegan Planet, though I have made several changes to the original recipe.

~Soysage Casserole~

  • roughly 2 Tbsp olive oil
  • 1 medium yellow onion, chopped
  • 3 cups crumbled soy sausage (I like to use two tubes of Lightlife Gimme Lean Soy Sausage, prepared as directed below)
  • 2 blocks soft or firm tofu, drained and then crumbled
  • 2 cups soy milk (or other non-dairy milk)
  • 1/2 tsp dried thyme
  • 1/4 tsp ground or whole fennel seeds (if using whole, chop them up into little bits – this is usually what I do)
  • salt and pepper
  • 8-10 slices of bread

1)  Heat the olive oil in a large skillet over medium heat.  Add the onion and cook until soft, about 5 minutes.  Add the soysage* and cook, stirring until browned. This will take several minutes.  Once browned, remove from heat & set aside.

*If you are using Gimme Lean Soy Sausage, do this by tearing it into little bits (roughly 1/2″ – 3/4″ pieces) and throwing them right into the skillet.  It’s a little sticky and mushy… just keep ripping it into small pieces (you can chop them up further with a spatula if necessary while you’re stirring them around with the onion) then continue following recipe above, cooking until lightly browned.

2) In a large bowl, combine the crumbled tofu, milk, thyme, fennel, and a little salt and pepper to taste.  Mix well, then mix in the sausage mixture and set aside.

3)  Tear the bread into bite-sized pieces and place in a lightly oiled shallow 9 x 13″ baking dish.  Pour the sausage mixture evenly over the bread and set aside several minutes until the liquid is absorbed, about 20 minutes or overnight. If it looks a bit dry anywhere, it doesn’t hurt to add a splash of soymilk where needed.  (If you do refrigerate until morning, let it come to room temp before baking.)

4)  Preheat oven to 350 F. Bake until the casserole looks puffy and lightly browned, about 45 minutes.  Let sit for 10 minutes before cutting and serving.  Let cool slightly. Devour!

Mmmmm! I could eat this for every meal!

Banana Chocolate Chip Scones

When someone asks me what I would do if I had all the money and time in the world… several things come to mind.  First off, I love being a mom.  Trying to teach my kids how to be good people is the most important job in the world to me. But that is a job that will never go away, regardless of time or money!  So… next up is helping animals – I am extremely passionate about animals. I love rescuing animals (all 4 of my current pets were rescued) & teaching others to respect and love animals, and I love to show people how many ways there are to help animals, like eating vegan (hence my blog). I would love to operate an animal shelter and rescue/foster animals that need help.  Another thing I love and completely lose myself in is producing art, but it seems (at the moment) I have less time for that now that I am chasing down two little kids!  And last, but certainly not least,  I LOVE to bake!  Cookies, muffins, scones, bread… I definitely feel I am more of a “baker” than a “chef”.  And not only does my baking come from the heart, but it also helps (in a small but important way) bring my love of animals to the table – no pun intended!! I love to produce yummy things from the oven and simultaneously introduce people to the joys of baking without using animals as ingredients 🙂

That being said, I would love to share with you one of my most favorite breakfast scones recipe. No one can deny the goodness of the combination of bananas and chocolate.  (And yes, you can easily find vegan chocolate chips – and I’m not talking about carob chips, which I personally don’t care for.)

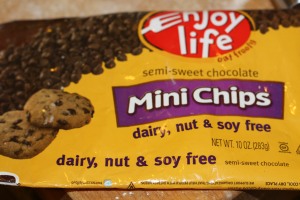
Here's one of my favorite kinds of vegan chocolate chips! These chocolate chips are tiny, cute & delicious!

I also find that using part whole wheat pastry flour gives a fluffy end result that wouldn’t turn out the same if you used only white flour. Mmmm. I just pulled mine out of the oven and they smell so good I can barely wait for them to cool for 5 minutes!!

Banana Chocolate Chip Scones

  • 1 1/4 cup whole wheat pastry flour
  • 3/4 cup unbleached all-purpose flour
  • 1/2 tsp salt
  • 1/2 tsp baking soda
  • 2 tsp baking powder
  • 1/3 cup canola oil
  • 1  1/2 cups chopped bananas (or about 2 small bananas)
  • 1/2 cup vegan chocolate chips
  • <1/3 cup maple syrup
  • 6-7 Tbsp soymilk
  • capful of cider apple vinegar (about >1 tsp)

1) Mix both flours, salt, baking soda, baking powder in a large bowl.  Mix well.

2) Cut in 1/3 cup canola oil with a fork and crumble well to eliminate all balls of oil.  Start with a fork and then use your hands if you wish.

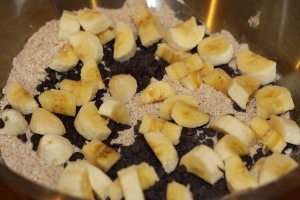
3) Mix in the fruit / chocolate chips

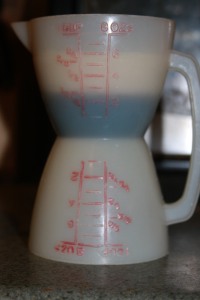
4) In measuring cup, measure the maple syrup, soymilk & vinegar.  The liquids should measure (total) just at 3/4 cup. Whisk them together well, then pour the liquids into the dry mix and fold until it is just mixed.  It may take a minute, just keep folding it over and over from all directions until all the flour is mixed in and no big patches of flour are present.  The batter will be thick.

Measuring out the liquids... be sure to whisk it together well before adding it to the bowl!

5)  Scoop by using a 1/2 cup measuring cup onto a parchment covered baking sheet.  When I do it this way, I get 7 scones.  Press them down slightly in the middle  (they will spread a little tiny bit in the oven).

6)  Bake at 400 for about 12 minutes until bottoms & sides are lightly browned.

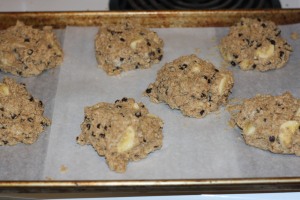
Bake until golden brown & yummy looking!

If you ask me, nothing goes better with a delicious chocolate chip scone than some delicious coffee in a Cookie Monster mug!

Variations: You can replace the chocolate chips with nuts, or add nuts to the batter as well.  You could also use strawberries instead of bananas, though I have never done that with this recipe.  I have another recipe I prefer for strawberry/chocolate chip scones with walnuts, which I will probably share another time!